Printing
This week we’ll finally get to what we’ve all surely been looking forward to the whole time. We’ll use the acquired theoretical knowledge and apply it practically.
We’ll get familiar with the printer, explain what its individual parts are for, and prepare it for printing. We’ll get familiar with the tools we’ll use to transfer print data and start printing, and finally print something on the printers.
Getting Familiar with the Printer
On the table in front of you there should be an FDM Hybrix printer and one or two spools of plastic material.
In the photograph below, familiarize yourself with the terms that will be mentioned further in the study text.
Důležité:
The printers were recently upgraded from RebeliX printers and not all photographs here correspond to the current state. We’re working on updating the materials.
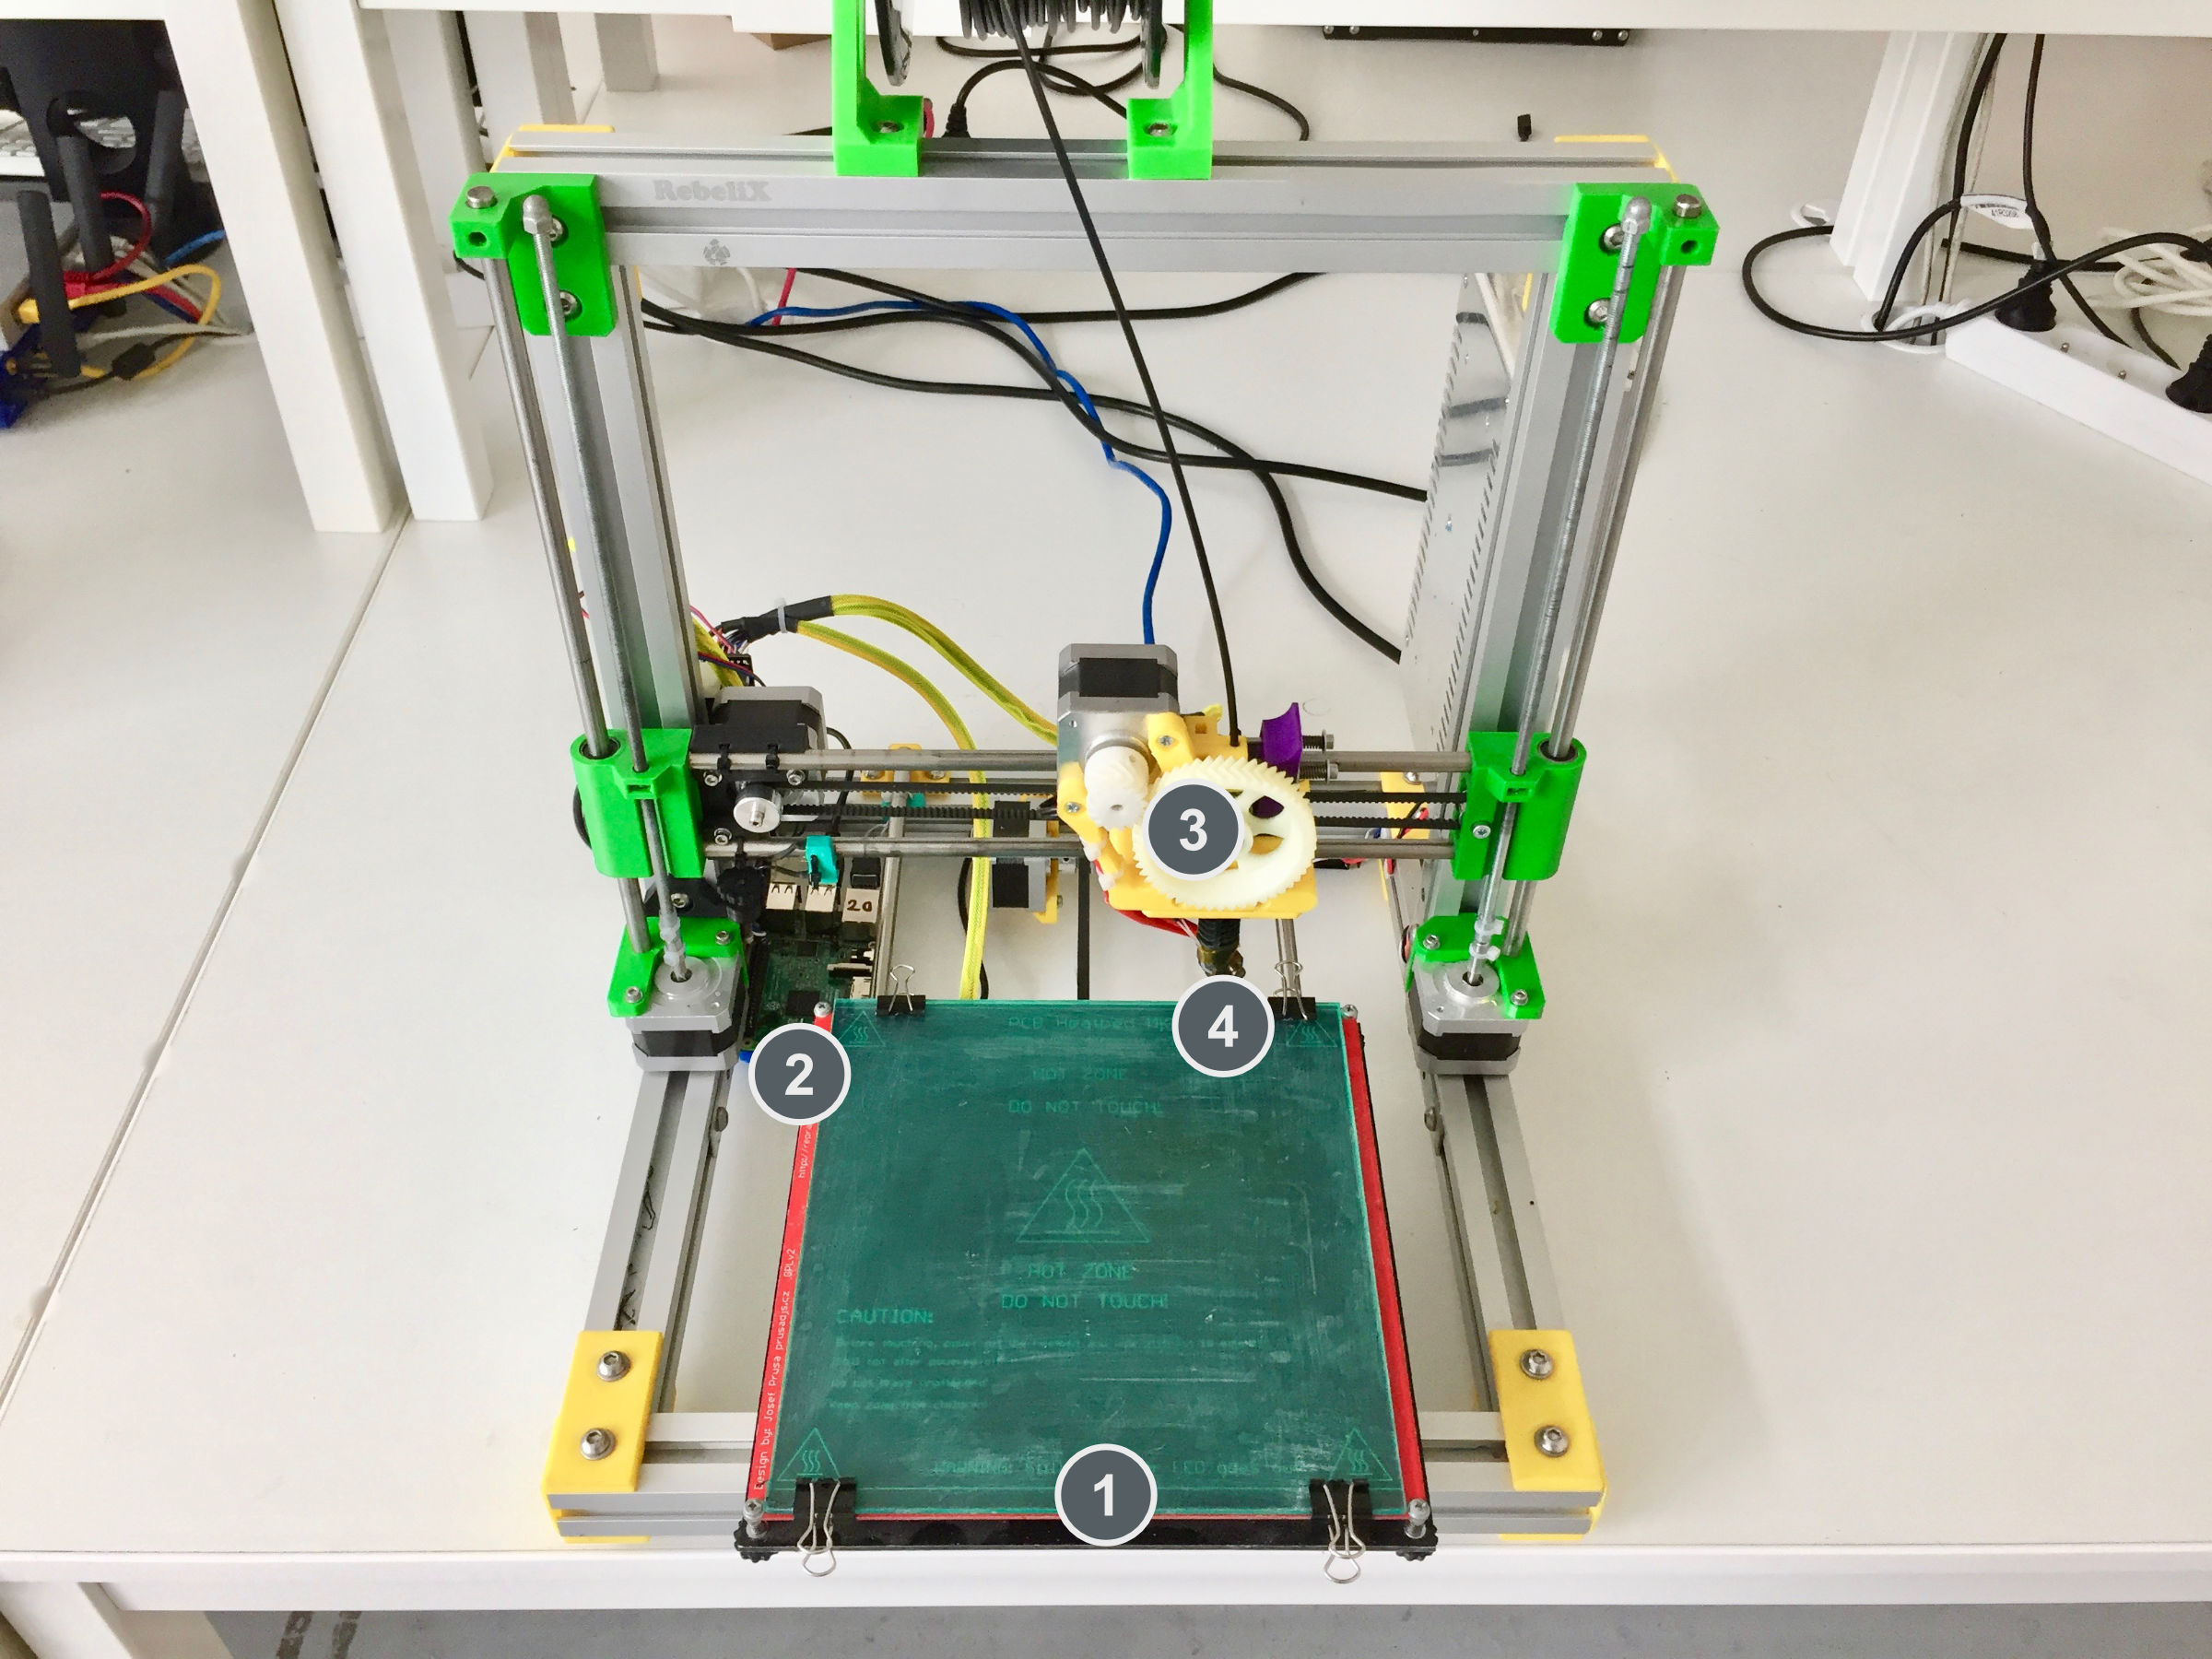
- Print bed (heatbed)
- Raspberry Pi (not on Hybrix printer)
- Extruder
- Nozzle (hotend)
Controlling the Printer
We won’t control the printer by direct connection to the computer, but we’ll delegate the responsibility for transferring print data to control software that’s part of each printer in the classroom.
Each printer is connected to the school network and can be controlled via web interface.
Connecting to the Printer
To connect to the network where printers are accessible, use school computers.
On each printer you can find a label stating the printer’s address.
Connect to your printer from the school computer using the address on the label.
The address looks like this (where XX is a number from 01 to 14):
- Hybrix printer address
- http://printer-XX.3dprintlab.in.fit.cvut.cz/
- Voron 0.2 printer address
- http://voron-02-XX.3dprintlab.in.fit.cvut.cz/
If you can’t connect to the printer, try other options.
Upozornění:
After connecting, make sure this is the interface for your printer lying on the table. Although sabotaging classmates' prints may seem like fun, know that it’s not.
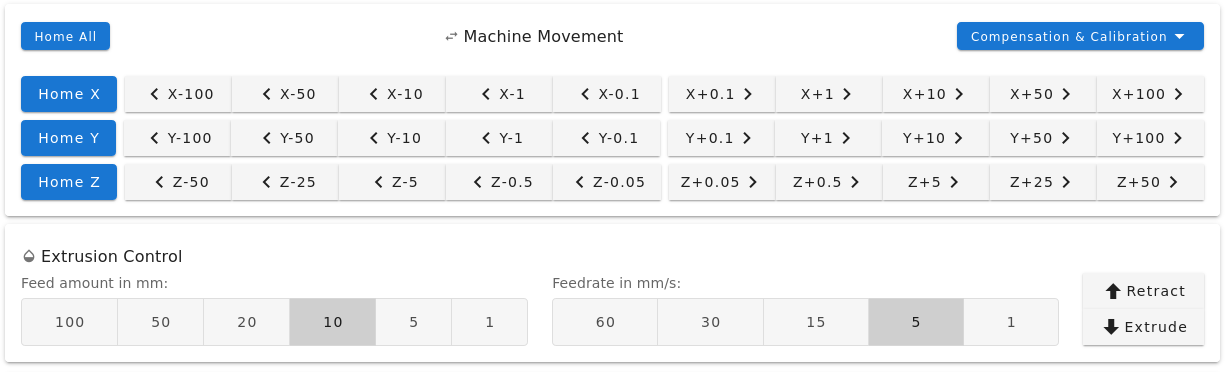
Manual Control
In the middle part of the web interface you can manually control the printer. You can move the print head in all three axes and also control the extruder.
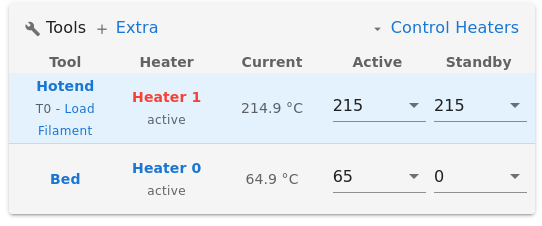
Preheating the Printer
Preheating takes on the order of minutes. To speed up work or to insert or remove filament, it’s necessary to heat the printer.
In the upper part of the interface in the Tools + Extra section, you can set the temperature to which the printer should heat.
Printing
Printing instructions are described in the chapter Printing Step by Step. Read the task assignments now so you know what’s expected of you, and then continue with the step-by-step printing instructions.
Printing Step by Step
This chapter will guide you through printing step by step. Most of this information you’ll learn in person at the exercise, however if you get into a situation where you’re not sure, or you didn’t hear or forgot the instructions from the exercise, this guide should be helpful.
Varování:
These instructions need to be verified and updated at the first exercise with new printers. Pay increased attention to what instructors say, and if there’s a discrepancy with these materials, please report this problem.
Preparing the Printer
Before starting printing, it’s necessary to follow several steps. If you don’t check the printer, you may end up with a bad print, or in the worse case with a damaged printer.
- Visually make sure the printer is not obviously damaged.
- Clean the print bed from impurities or remnants of previous prints.
- Check and possibly load filament. Make sure the spool can rotate freely during printing and won’t get stuck.
- Ensure the bed doesn’t hit things on the table during printing. It can either knock them over or get stuck on them and then the print won’t succeed.
Removing Filament
To remove filament from the nozzle, it must be heated to the melting temperature of the material. If you don’t heat the printer, the filament could break in the extruder and cause problems.
Heat the printer to the required temperature and in the printer interface click the Retract button.
Throughout the removal, keep your hand near the string, because after it’s completely removed, the string tends to shoot out and tangle.
Retract the required amount until the filament is removed.
Insert the removed string into the small eyelet on the spool so the filament doesn’t start tangling. Be careful when handling the filament. Remove the spool from the holder and put away the filament.
Loading Filament
The rule of a preheated printer applies exactly the same as for removing filament.
INFO: If you’re changing two materials with different printing/melting temperatures, use whichever temperature is higher. After completing the change, adjust the temperature according to the currently loaded material if necessary.

Check the filament end for defects. Filament can be:
- Uneven or broken.
- Have a melted end.
- Be "gnawed" by extruder gearing.
In any case, clip such part with pliers or break it off.
Cut the filament into a point and insert it into the hole on the extruder. Don’t force filament into the printer, just insert and gently press and in the printer interface click the Extrude button.
When the printer grabs the filament, you can let go. Extrude filament until plastic starts coming out of the nozzle. Continue extruding plastic until plastic of the correct color starts coming out of the nozzle (remnants of filament of a different color could have been in the nozzle).
Printing
Upload print data (in GCode format) to the web interface and start printing using the Upload & Start control.
Preparing print data to GCode format was covered in the chapter Slicing.
Download configuration bundle for the printers we use in this exercise:
Důležité:
The instructors will tell you at the exercise which printer you will use.
Upozornění:
Setting the correct configuration file is important. Improperly chosen configuration can cause GCode to contain instructions unsuitable for the given printer (e.g., it may start printing too fast/in the wrong place) and such instructions can cause unsuccessful printing, or in the worse case damage the printer. Modern printers usually have some protective features that protect them from damage, but it’s better to avoid these problems.
For Voron 0.2 Printer
Check that the loaded and selected printer setting is named Voron 0.2 and material Generic PETG.
For Hybrix Printer
Check that the loaded and selected printer setting is named Hybrix and material PET.
Assignment of Tasks
For today’s set of tasks, assume the role of a hardworking employee in the QC department of the fictional company "Pepa Prča Research", checking the output quality of 3D printers. Your task will be to verify whether the printer prints correctly and how well.
Task 1 (1 point)
Your first task is to verify that the printer actually prints the same dimensions that are in the model.
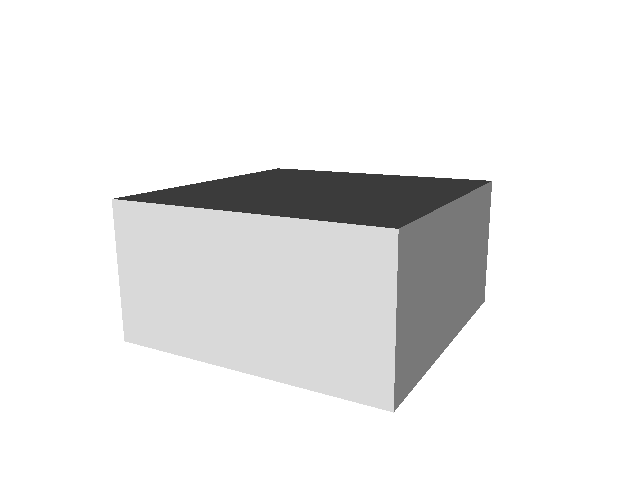
As a test object you chose the model of a cube with precise dimensions of 20×20×10 mm. You received a print profile for the printer that has been used on it so far. Let’s assume it doesn’t need to be adjusted from a calibration standpoint (values like nozzle size and material data are correct).
To save material, set up printing so that 4 cubes are printed and each of them is hollow, has one perimeter layer and no top layer (you should get 4 square cups as a result).
Task 2 (2 points)
Next you want to verify how small an object the printer can handle.
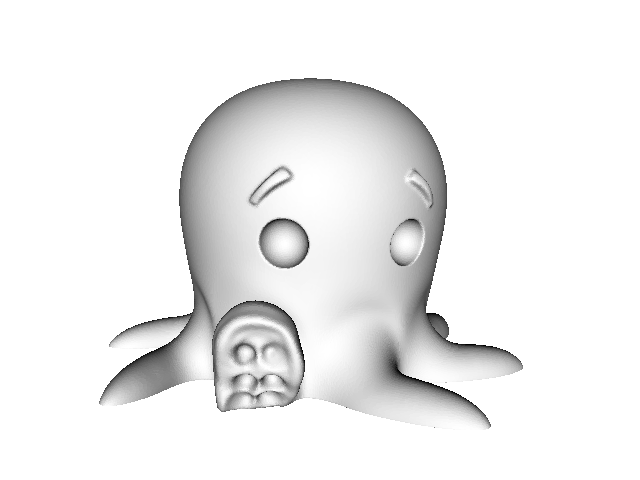
As a test object you chose Cute Octopus Says Hello (CC BY 3.0) from MakerBot on Thingiverse.com (mirror here). To save material, you’ll start at half the object’s size (scale 50%) and will try smaller sizes, depending on how much time you have left (then try for example 33%, 25%, 15%, etc.).
You’ll submit one half size (scale 50%) and another arbitrarily smaller (scale <50%), but successful. You can submit additional smaller sizes voluntarily, but they won’t affect the final number of points.
Task 3 (0 points, but mandatory)
Clean up your workspace. Those who don’t clean up won’t get any points.
If no other exercise follows this one, put the printer away in the cabinet. First make sure the nozzle has less than 100° C. Then disconnect the printer and take it to its shelf. Each printer has its place (places for printers > 12 will be communicated by instructors if necessary).
| Printer placement in cabinet | ||
|---|---|---|
| 1 | 5 | 9 |
| 2 | 6 | 10 |
| 3 | 7 | 11 |
| 4 | 8 | 12 |
After Finishing Printing
Very carefully remove the magnetic top part of the print bed with the print and with a slight bend remove the print. Clean the print bed and return it to the printer.
Don’t rush the process of removing the print from the print bed. Be careful not to damage your print or the print bed.
Varování:
Follow safe work rules to prevent injury. Beds can have sharp edges and parts of the printer are still hot after finishing printing and there’s a risk of burns. Be careful. If injury occurs, immediately contact the instructor.
After finishing printing and working with the printer (at the end of the exercise) don’t forget to clean up your workspace. Wait until the nozzle cools (approximately below 100℃) and disconnect the printer from the electrical network.